")
")
Install Linux on the server laptop
Now that we have made all the preparations, it is time to set up the server. This means that we are going to install the Linux Operating System and prepare it for our use. Because the server is always on anyway, we also install the Dynu IP Update Client on the server so that our Dynamic DNS registration remains up to date.
To install Linux on the server laptop we use the USB stick to start from, but first we have to download the necessary software. In the description I assume that you have a PC with Windows available to do this.
Download the software.
Ubuntu Server 20.04 LTS.
First we are going to download the ISO file for the installation of Ubuntu Server. We always download an LTS version. LTS stands for “Long Term Support”. At the time of writing, this was Ubuntu Server 20.04 LTS. You can download the ISO file from https://ubuntu.com/download/server. Choose “manual installation” on this page and download Ubuntu Server 20.04 LTS.
Win32DiskImager version 1.0.0.
The software we use to create the bootable USB stick is Win32DiskImager. You can download an installer and install the software on your PC, but that is not really necessary. You can also download the so-called binary release. This is a ZIP file that you can extract and use the software without having to install it. You can download the binary release from:
https://sourceforge.net/projects/win32diskimager/files/Archive/Win32DiskImager-1.0.0-binary.zip/download.
You can download the installer from:
https://sourceforge.net/projects/win32diskimager/files/Archive/win32diskimager-1.0.0-install.exe/download.
HDD Low Level Format 4.40.
Another handy tool to have on hand is HDD Low Level Format. With this you can always return the USB stick (or any other storage) to the factory-new situation. Again, in addition to an installer, you can download a zip file with the stand-alone executable.
You can download the installer from:
https://hddguru.com/software/HDD-LLF-Low-Level-Format-Tool/HDDLLFsetup.4.40.exe
You can download the stand-alone executable from:
https://hddguru.com/software/HDD-LLF-Low-Level-Format-Tool/HDDLLF.4.40.exe.
Write the bootable USB stick.
Follow the steps below to write the USB stick:
- Insert an empty USB stick into a free USB port.
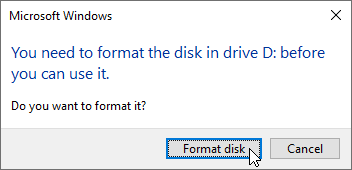
When inserting the USB stick, you may receive a message like the one below stating that it needs to be formatted. You can ignore this message.
- Extract the Win32DiskImager ZIP file, and double click Win32DiskImager.exe.
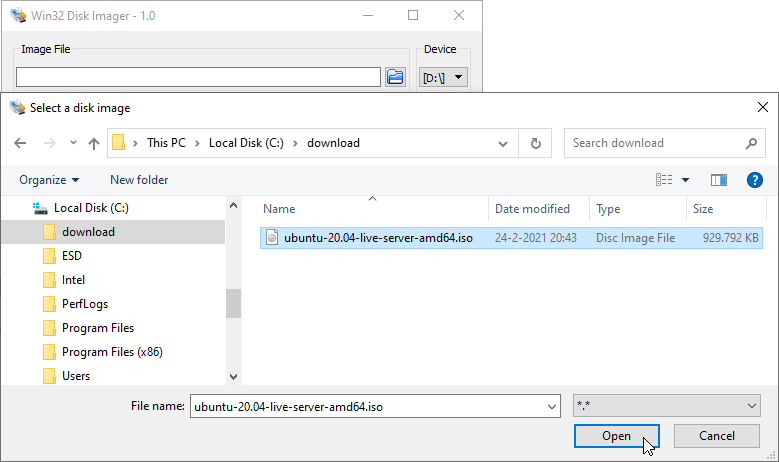
- Select the USB stick as the target device and the previously downloaded ISO file as the image file.
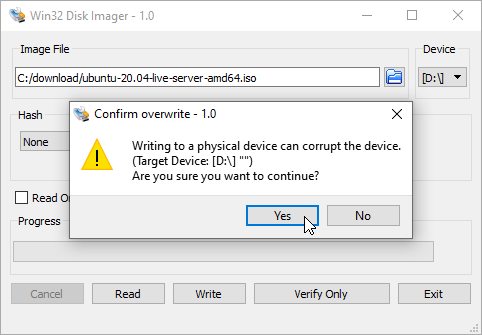
If you cannot find the ISO file to select it, you have to use the drop-down box at the bottom right of the selection screen. Select *.* (see first screenshot below) - Select the ISO file you downloaded earlier, select the USB stick as the target device and click “Write”. A warning will appear like the middle image below. Click Yes to continue.

- When the writing is successful, the program can be closed and the USB stick can be safely removed.
What if writing to the USB stick fails?
If you have previously used your USB stick as a boot disk to boot your computer, it sometimes happens that Windows no longer recognizes the USB stick (properly) and you cannot do much with it. In such cases it is best to completely empty the USB stick and also delete the partition table. The USB stick is then completely “clean” and like new. You can use the HDD Low Level Format Tool for this. Below is how to do that.
- Insert the USB stick into a free USB port on your computer.
- If you downloaded the stand-alone executable, double-click HDDLLF4.40.exe.
- In the first screen, click the "Continue for free" button.


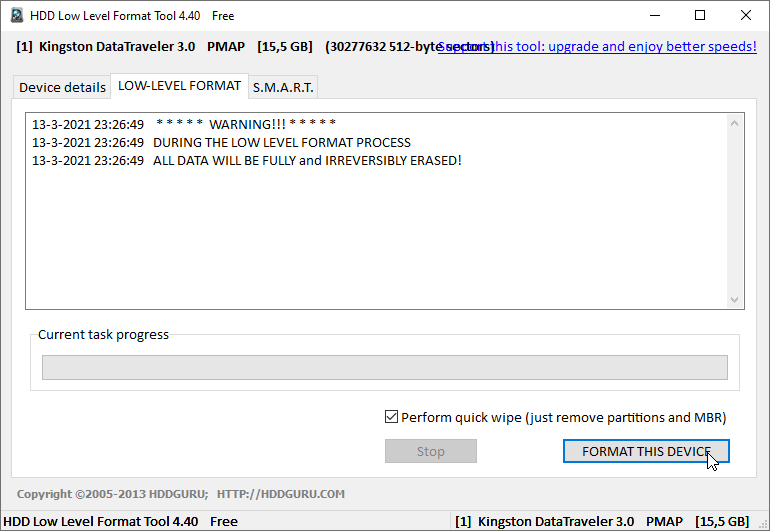
- Select the correct storage device, (your USB stick) and click on the “Continue & gt; & gt; & gt;” button. Make sure you're not mistaken, the device you select here will be completely erased.
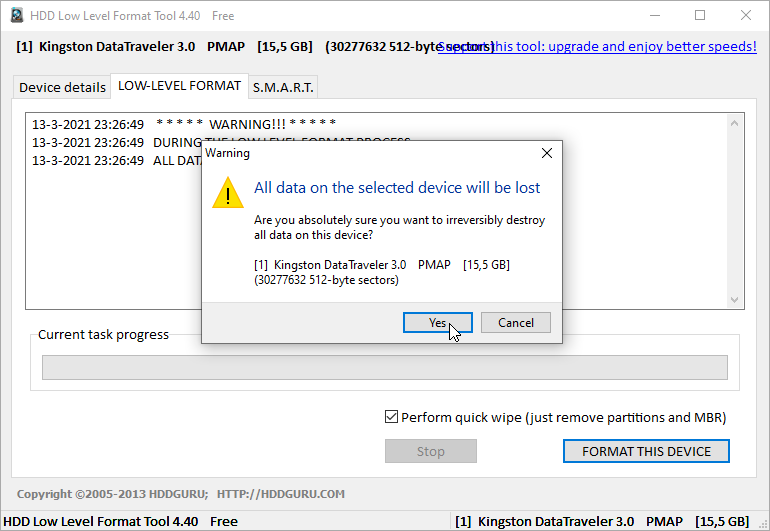
- Select the middle tab (LOW-LEVEL FORMAT), check the “Perform quick wipe” option and click the “FORMAT THIS DEVICE” button.
- You will now see a warning that all data will be erased, and ask if you are absolutely sure you want to continue. Click the “Yes” button to continue.
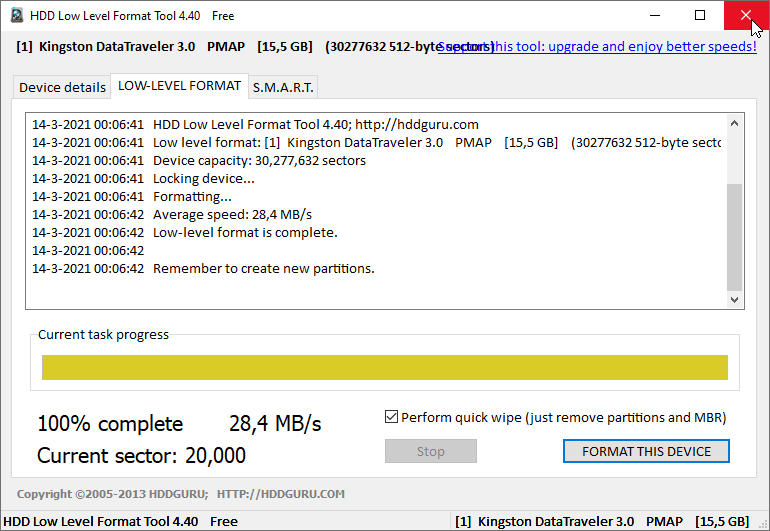
- Within a second the partition table and Master Boot Record are erased from the USB stick. It is now “factory new” again.
After you have used this USB stick to install the Linux Operating System, you can then prepare it for normal use again in the same way.
Install the Ubuntu Server operating system.
Below are the steps to install Ubuntu Server 20.04.
- Insert the USB stick into a USB port of the laptop and boot the laptop from the USB stick.
NOTE: You cannot use your mouse within the Linux machine.
Use the cursor keys and the Tab keys to select fields.
If it is a checkbox, it is checked if it contains an X.
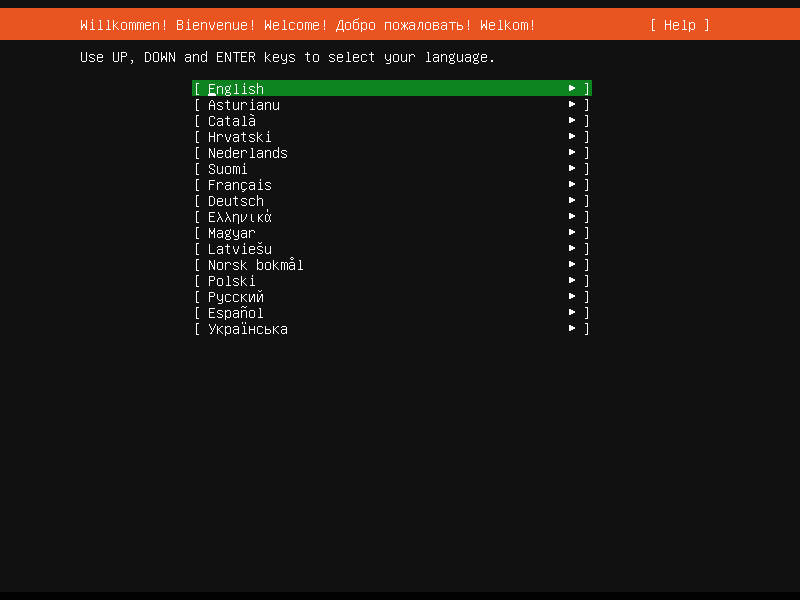
Use the spacebar to toggle such a field on or off. - In the first screen, leave English selected and press Enter.
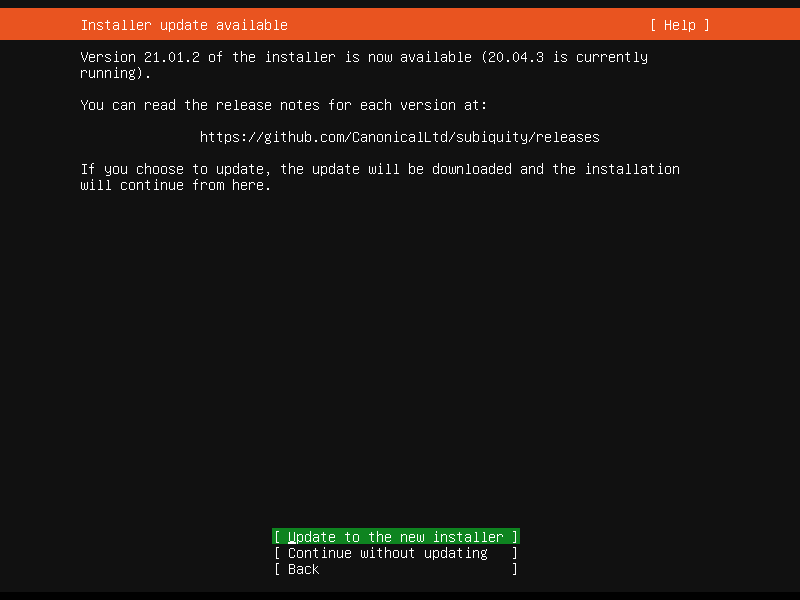
- The next screen will indicate that a new installer is available.
Select at the bottom of the screen using the cursor keys Update to the new installer and press Enter. The new installer will now be downloaded and used for the rest of the installation process.
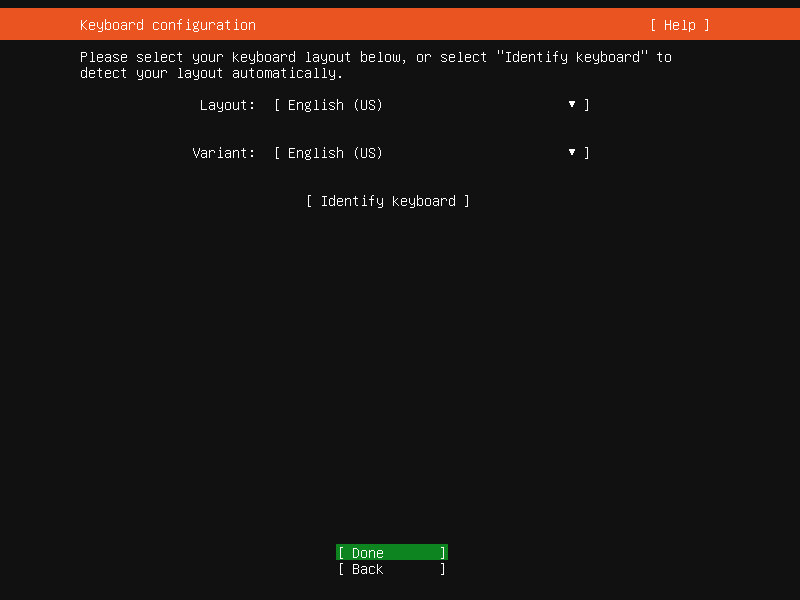
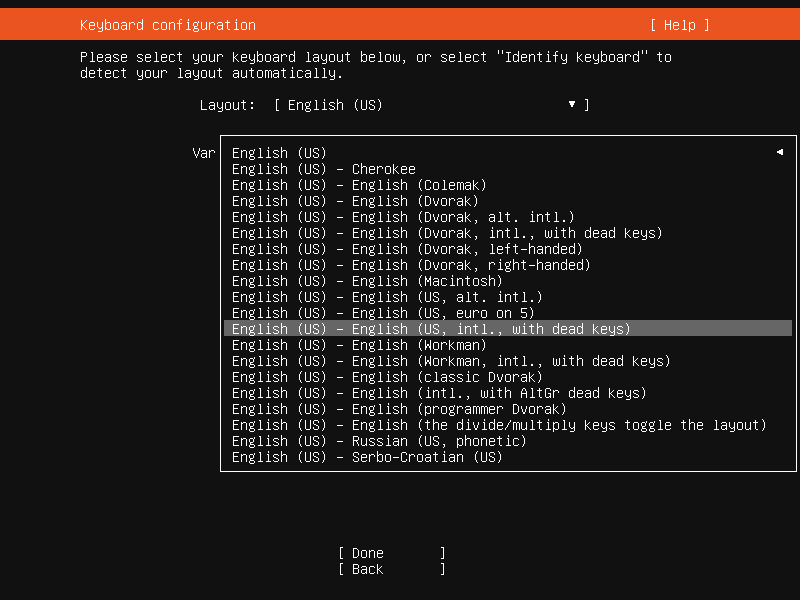
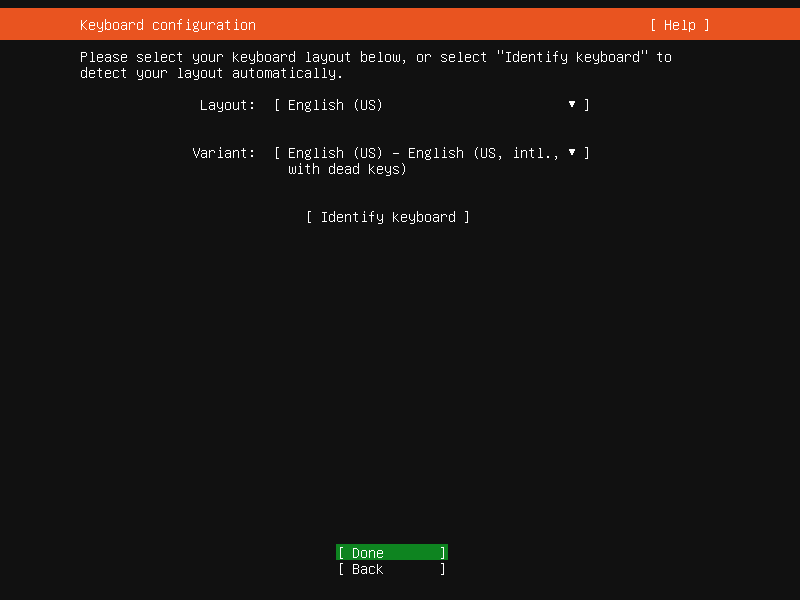
- The keyboard configuration screen will appear. Select English (US) as the layout and English (US) - English (US, Intl., With dead keys) as the variant. Then select Done at the bottom of the screen and hit Enter.
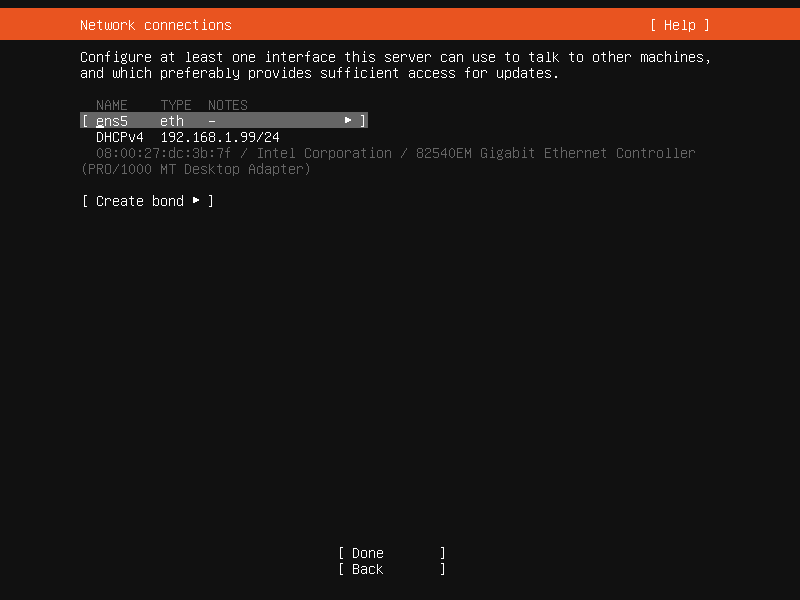
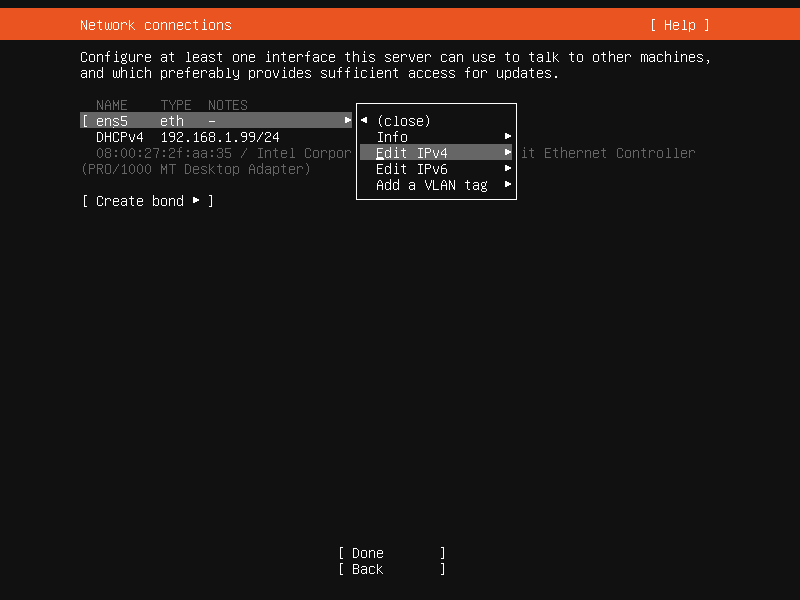
- In the Network connections screen, the IP configuration must be changed from DHCP Client to a fixed IP address.
- Select ens5 and press Enter. (It may have a different name depending on your hardware)
- Select Edit IPv4 and hit Enter.
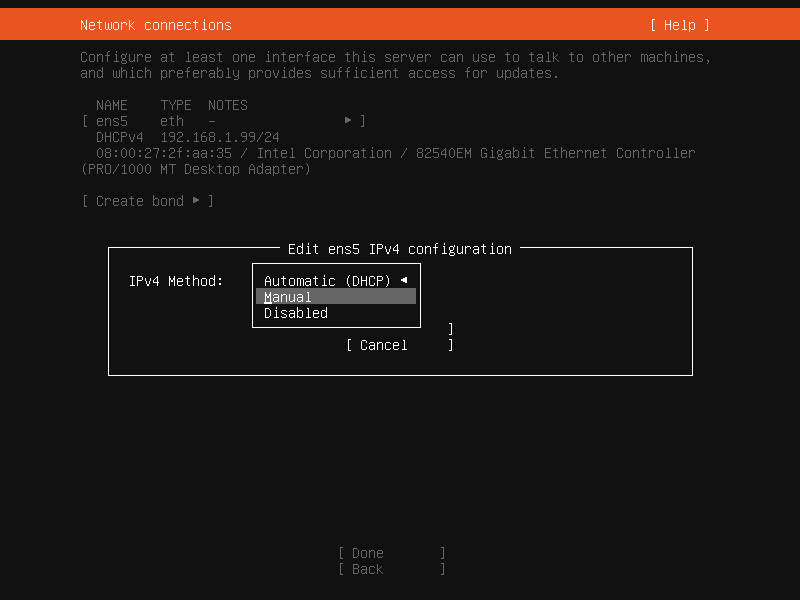
- Change IPv4 Method to Manual and hit Enter.
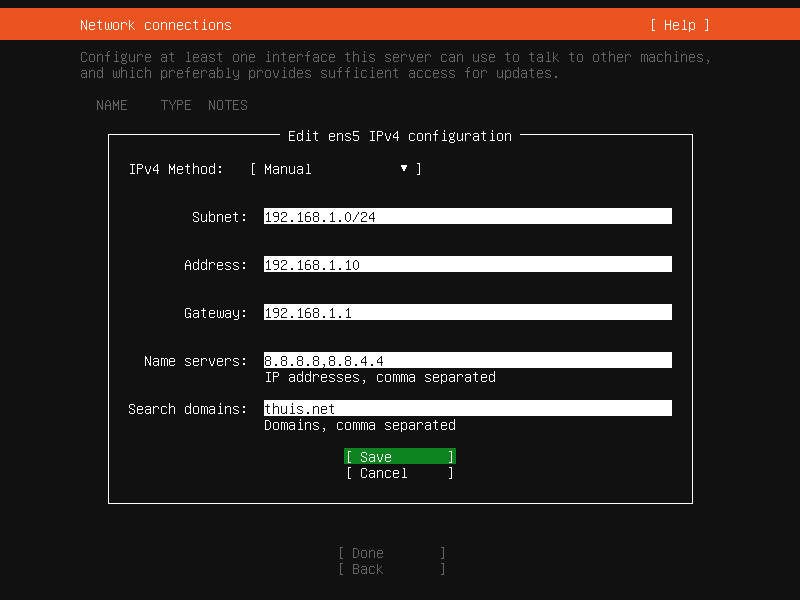
- Enter the address data as required in your home network. In my case this is:
Subnet: 192.168.1.0/24
Address: 192.168.1.10
Gateway: 192.168.1.1
Name servers: 8.8.8.8,8.8.4.4
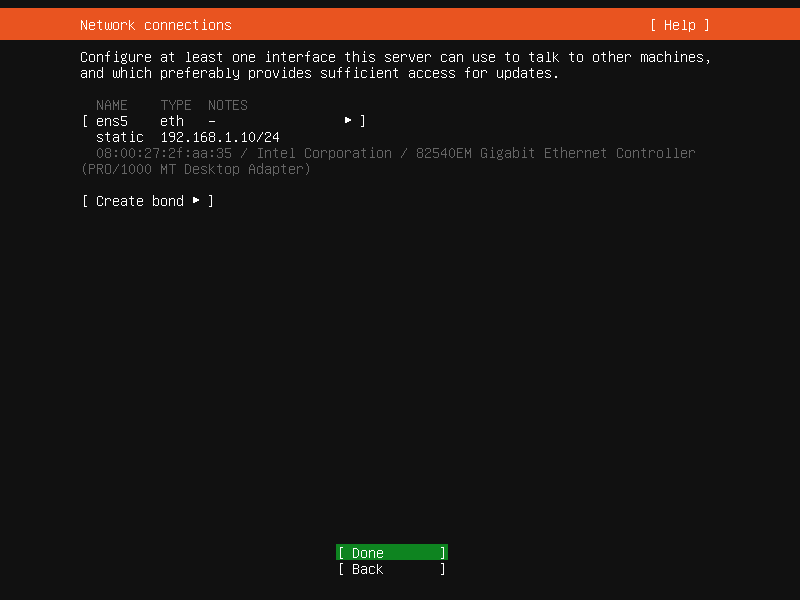
Search domains: multinet.mywire.org (The domain name as we chose it at Dynu.) - Select Save and press Enter. You will now return to the Network connections screen. Under ens5 eth you now see static 192.168.1.10/24.
- Select Done and press Enter.

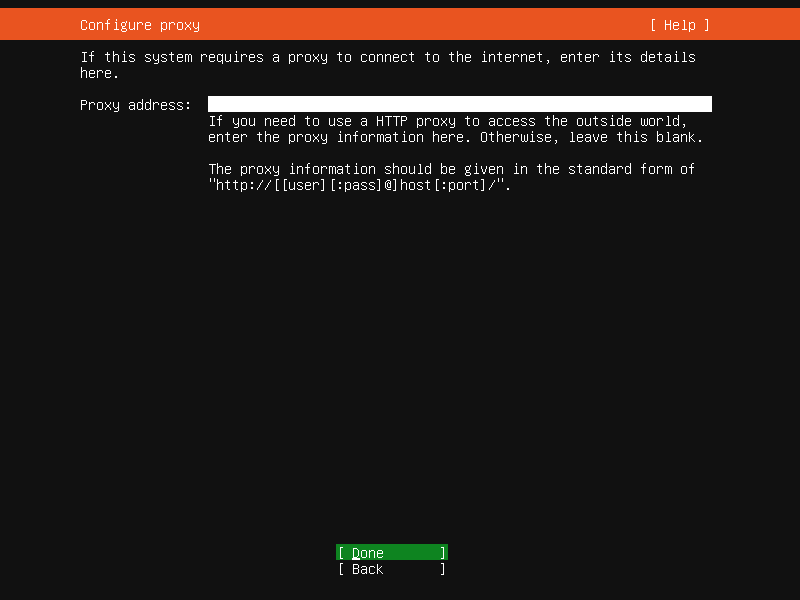
- In the next screen, leave the Proxy address blank, select Done and hit Enter.
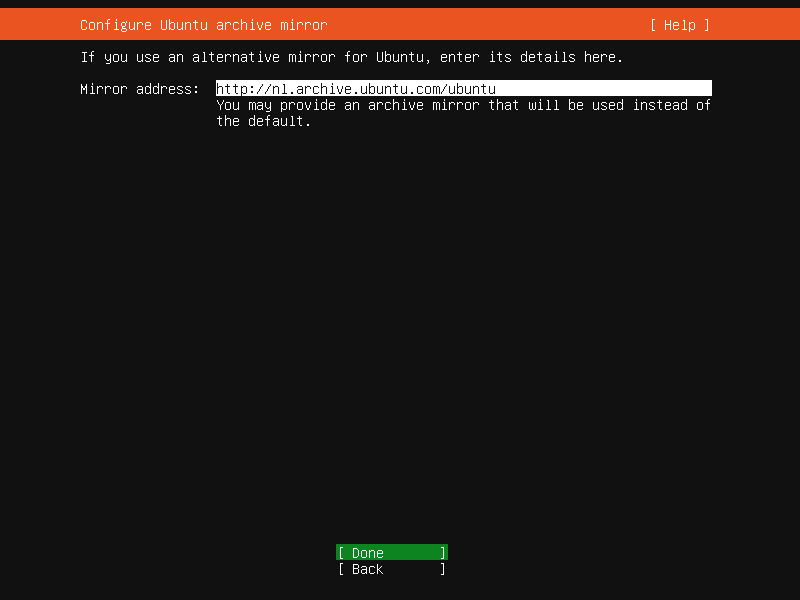
- In the next screen, leave the default value, select Done and press Enter.
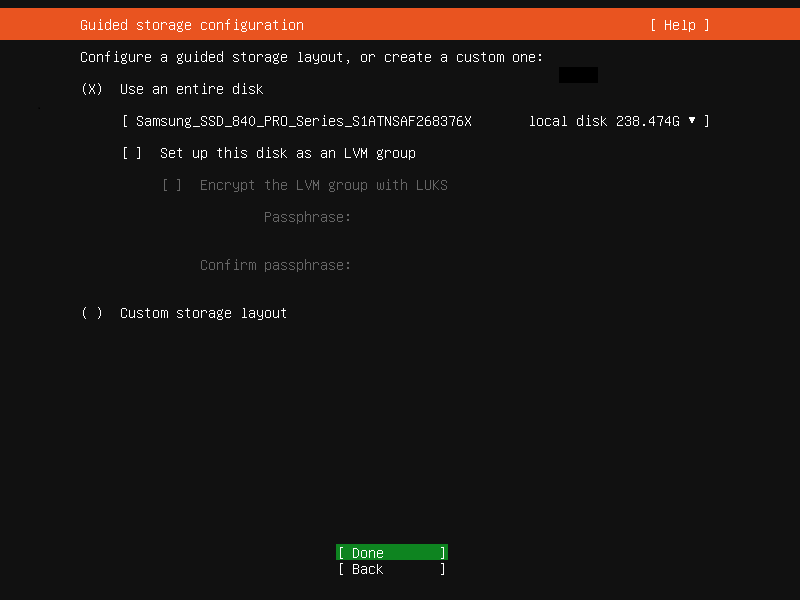
- You will now be taken to the Guided storage configuration screen.
- Select (X) Use an entire disk.
- Leave all other options unselected.
- Select Done and press Enter.
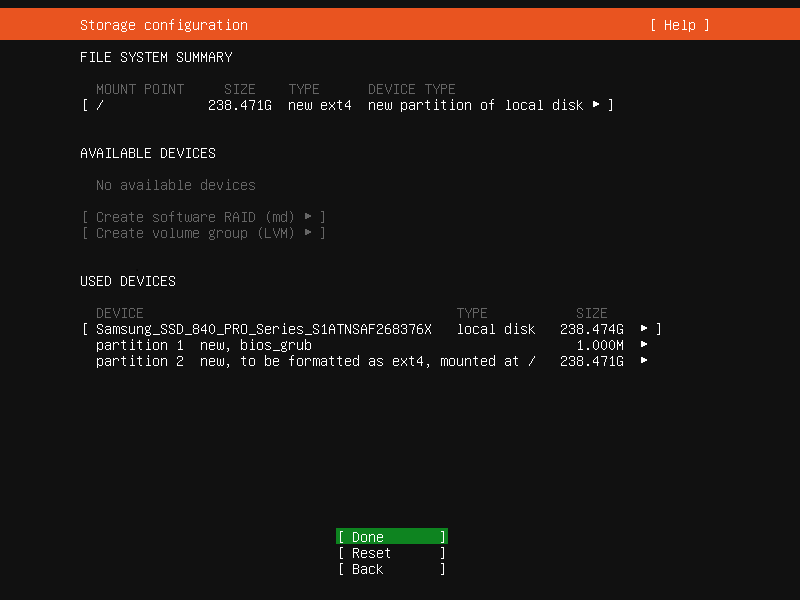
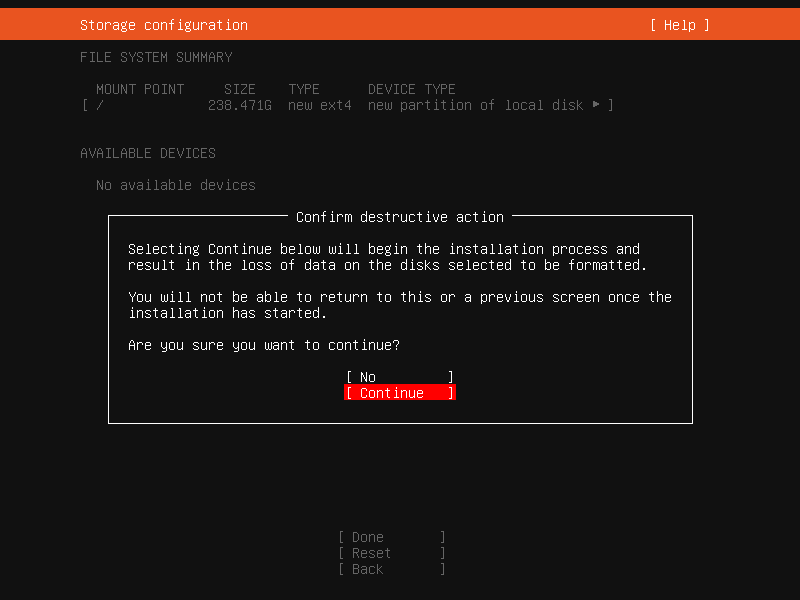
- You will now be taken to the Storage configuration screen which should look like the middle image below. Select Done and hit Enter.
- You must then confirm the choices. Select Continue and hit Enter.
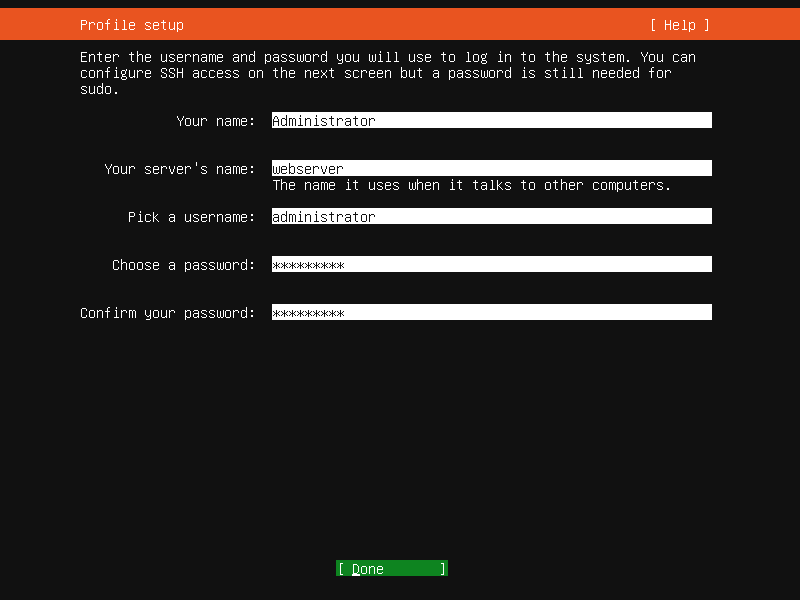
- You will now be taken to the Profile setup screen. Enter the following values:
Your name: <full name, e.g. John Doe, or Manager>
Your server's name: webserver
Pick a username: <login name, e.g. john, or manager>
Choose a password: <password>
Confirm your password: <password>
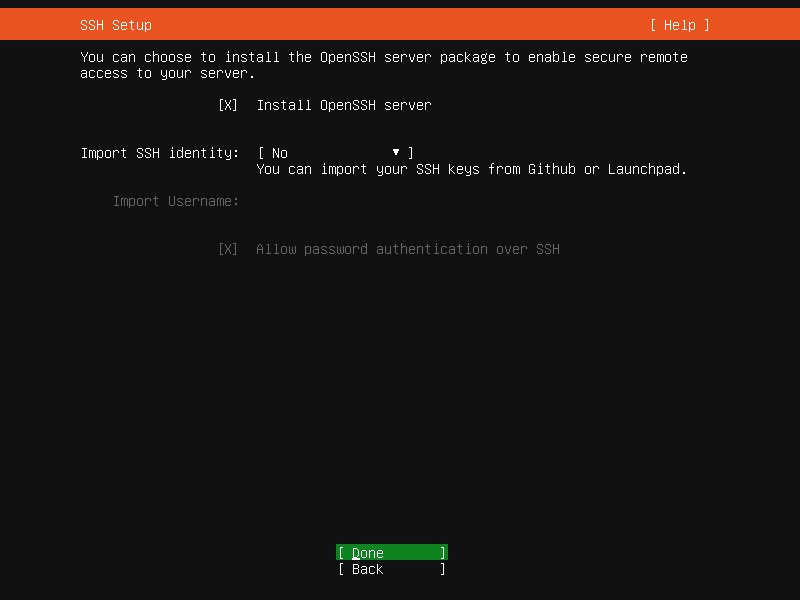
Select Done and press Enter. - You will now be taken to the SSH Setup screen.
Select [x] Install OpenSSH server, then select Done and press Enter. - Select nothing in the Featured Server Snaps screen, just tab to Done and press Enter.
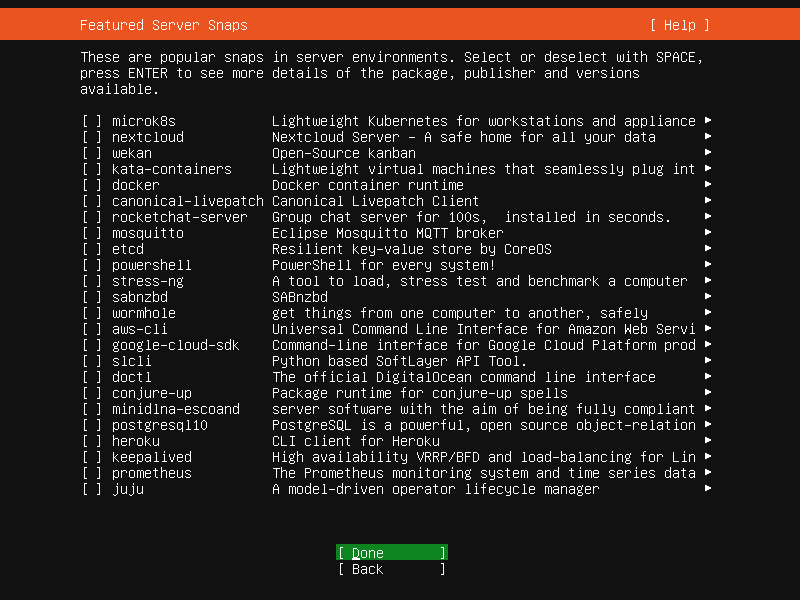
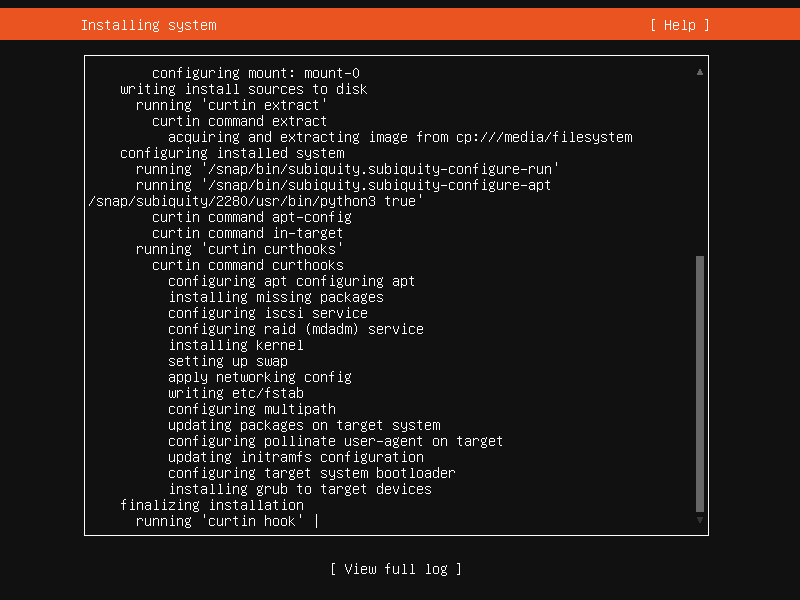
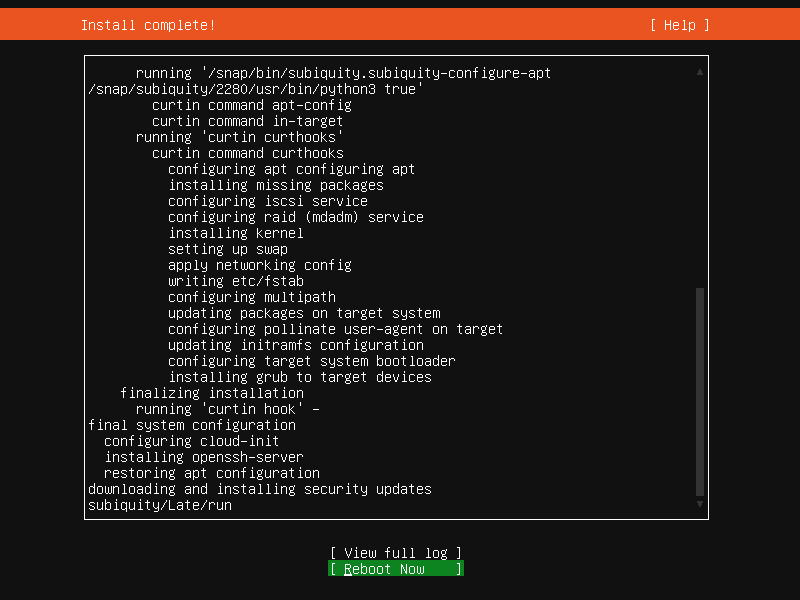
- The installation will commence. After the initial installation, the installer checks if there are any security updates available. If so, they will also be installed.
- When installation is complete, select “Reboot” to reboot the server.
During the restart you will be asked to remove the installation medium. You can then remove the USB stick. Since this is the very first time the server boots up, a few things are done first, such as generating fingerprints for SSH, etc. This will cause some messy output to run over your screen, making the login prompt disappear. If you just press Enter, the login prompt will reappear at the bottom of the screen.
Perform updates and install net-tools.
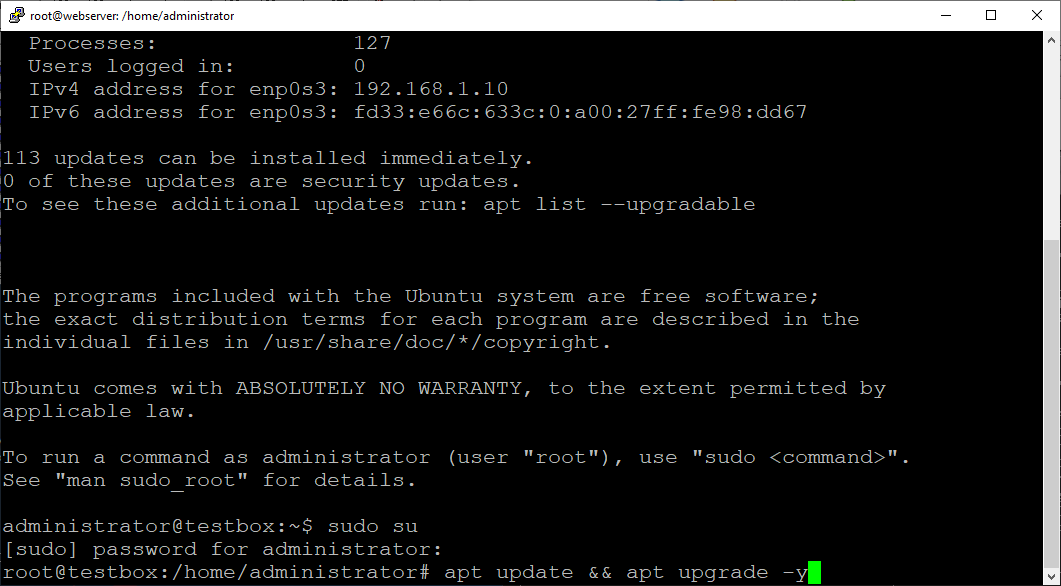
After the server laptop has restarted, we log in with the username and password that were created during the installation. You can do this on the laptop itself, but you can also use PuTTY to use SSH to connect to the IP address of the server laptop. After login, we will first install all updates.
To make sure we execute these commands as the root user, we issue the command:
sudo su
You must enter your password again for this.
The first step is to see what updates are available. This is done with the command:
apt update
This command retrieves a number of lists of available updates and checks which of them apply to our server.
Then we can install the updates with the command:
apt upgrade
This command first shows which updates will be installed. You must confirm that you want this by entering y. You can also enter this confirmation directly on the command line. The command then becomes:
apt upgrade -y
It is also possible on Linux to issue multiple commands at once. We could also issue those two update installation commands all at once like this:
apt update && apt upgrade -y
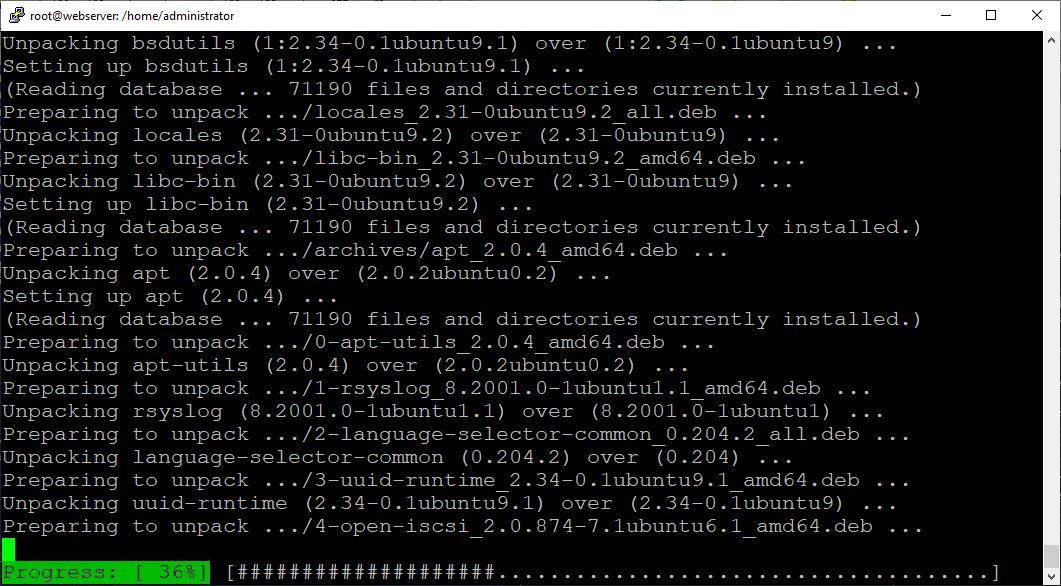
All available updates will be installed, so: “Sit back and watch the show”.
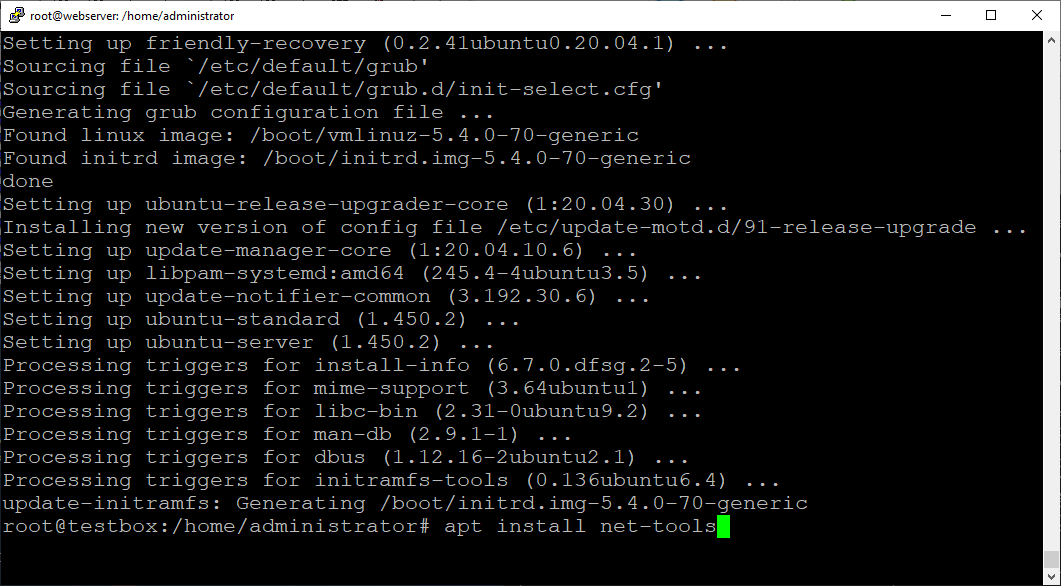
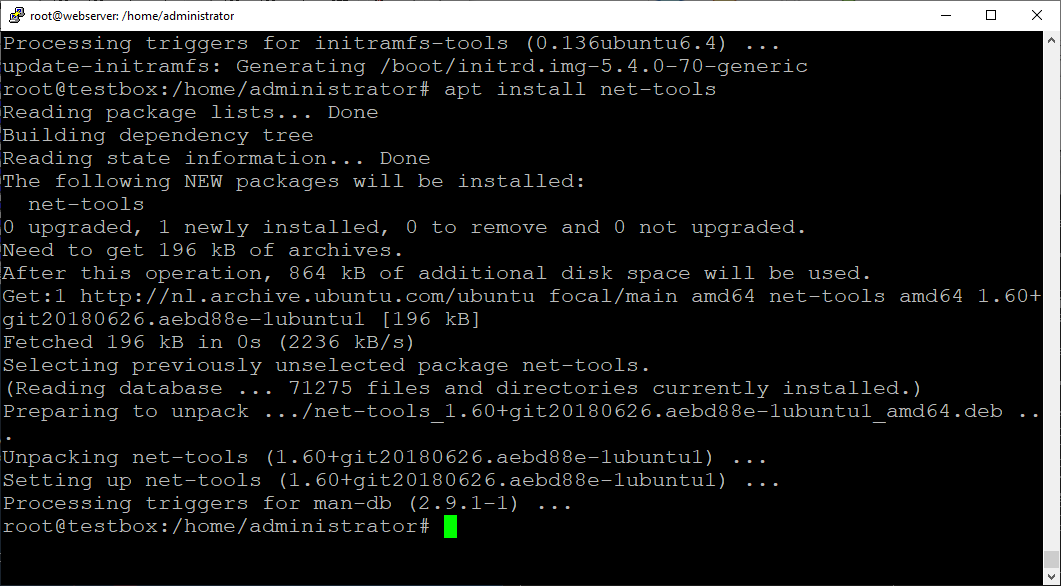
After the updates have been installed, we will also install the net-tools package. This is also done with the apt packet manager with the command:
apt install net-tools
Make the other settings
Next, there are a number of settings that we need to adjust. We do this by modifying a number of configuration files. The real Linux die-hards use the word processor vi for this. It is present in almost all Linux distributions, but many beginning Linux users find it intimidatingly complex. Fortunately, Ubuntu also has the text editor nano on board, which is already a lot easier to use.
The nano text editor.
We start this editor by entering the word nano on the command line, followed by the name of the file we want to edit, for example:
nano /etc/hosts
This will open the "hosts" file in the "/etc/" folder. If the file does not exist, nano will open a new empty file. You navigate through nano with your cursor keys (after all, you don't have a mouse available). You end nano by holding down the Control key and typing x. If you have made changes to the file, nano will ask if you want to save the file. Type a y if you want, or a n if you don't want to save the change.
Because you need root permissions to edit the configuration files, we give this command before we start:
sudo su
After entering your password you have root privileges.
Make sure the server can find its own host name and domain name.
First we will make sure that the server can find the IP address of its own Fully Qualified Domain Name (FQDN), so if during the installation we e.g. have given the hostname 'webserver', using the domain 'multinet.mywire.org', and also the IP address 192.168.1.10, then we need to make sure the server knows that 'webserver.multinet.mywire.org' lives on IP address 192.168.1.10. We are going to edit the file "/etc/hosts" for this. So we issue the command:
nano /etc/hosts
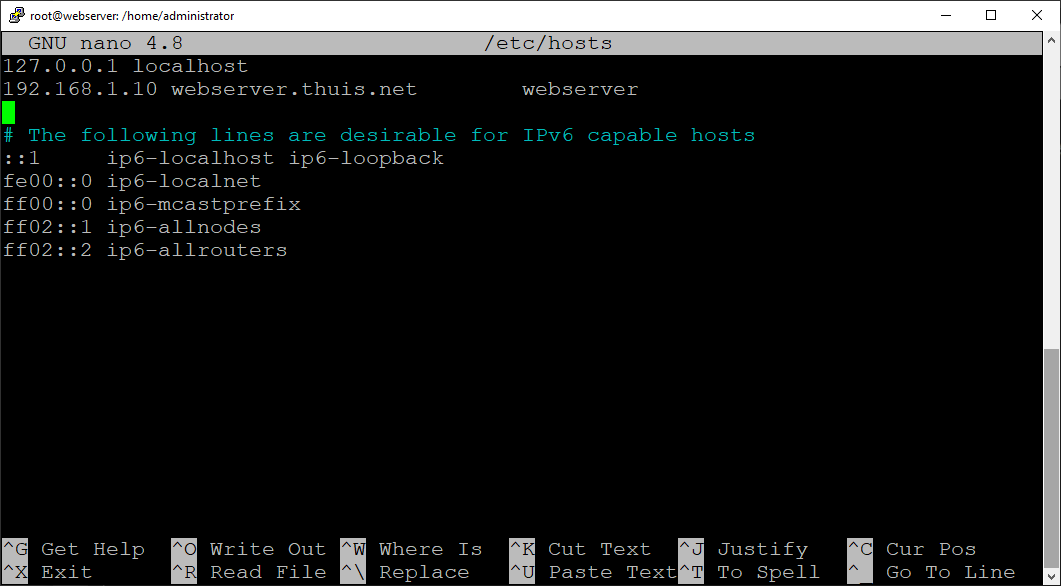
We delete the line "127.0.1.1 webserver", and replace it with the line:
192.168.1.10 webserver.multinet.mywire.org webserver
This will cause both "webserver.multinet.mywire.org" and "webserver" to be translated by the server to 192.168.1.10.
We now end nano by typing <Ctrl>-x, we type y when asked if we want to save the file, and then press <Enter> to actually do that.
Adjust the power management.
We now have a laptop that we want to run 27/7 as a server. Unfortunately, most laptops have a switch that closes as soon as the laptop lid is closed, causing most operating systems to put the laptop into sleep mode or shut it down. And that is of course not what we want, because we want to stow the laptop away somewhere with the lid closed. After all, we will soon be able to manage it remotely, and then it will not be necessary to be connected to the laptop itself.
To ensure that the server laptop is always on, even when we close the lid, we have to edit the file "/etc/systemd/logind.conf". So now we issue the command:
nano /etc/systemd/logind.conf
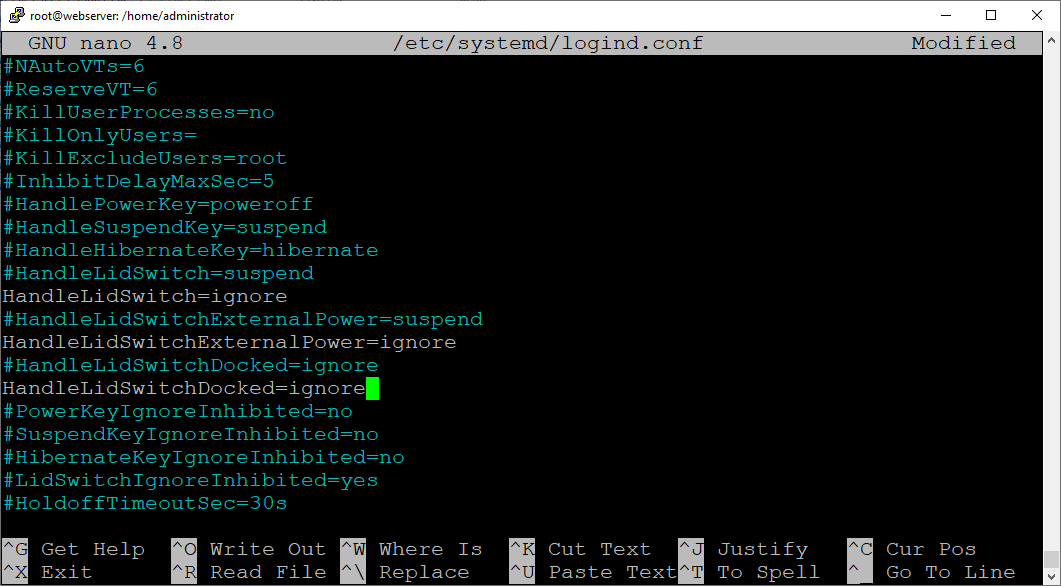
- Find the line "# HandleLidSwitch = suspend" and
change it to "HandleLidSwitch = ignore". - Find the line "# HandleLidSwitchExternalPower = suspend" and
change it to "HandleLidSwitchExternalPower = ignore". - Find the line "# HandleLidSwitchDocked = ignore" and
change it to "HandleLidSwitchDocked = ignore". - Save the file.
As you can see in the screenshot above, I have the habit of leaving the original line as it is, commenting it out (if it isn't already) and adding the modified line below it. That way I can always check later what the original line was.
Prevent updates from installing automatically.
Because we like to have control over when the updates are installed, we don't want this to happen automatically. We can arrange this in the file "/etc/apt/apt.conf.d/20auto-upgrades". Again, we open this file in nano:
nano /etc/apt/apt.conf.d/20auto-upgrades
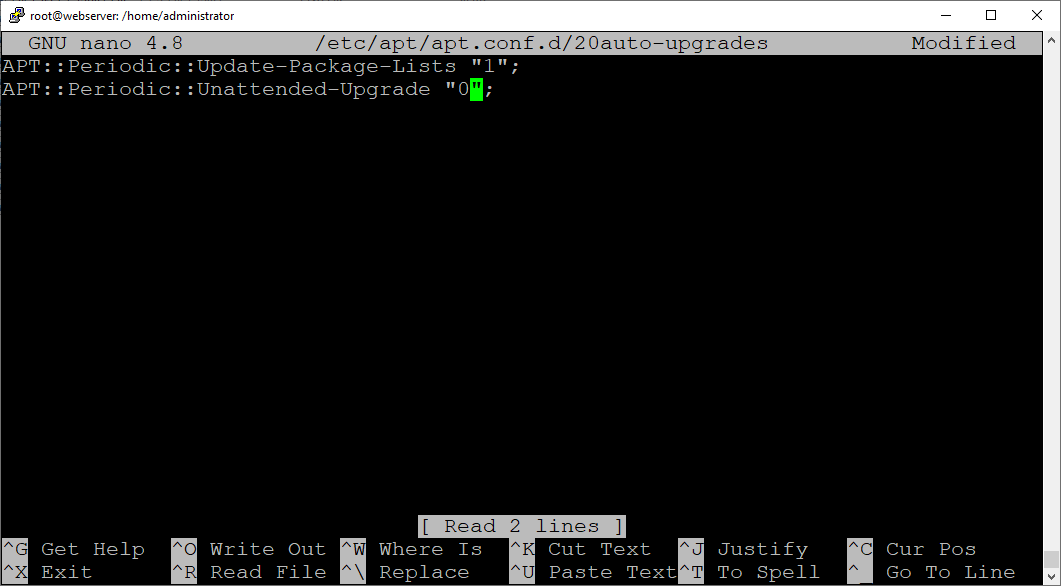
All we have to do in this file is change the 1 on the second line to 0.
Then again, save the file.
Correct the time zone setting.
The time zone is moost likely set to GMT at the moment. We can check this with the command:
timedatectl
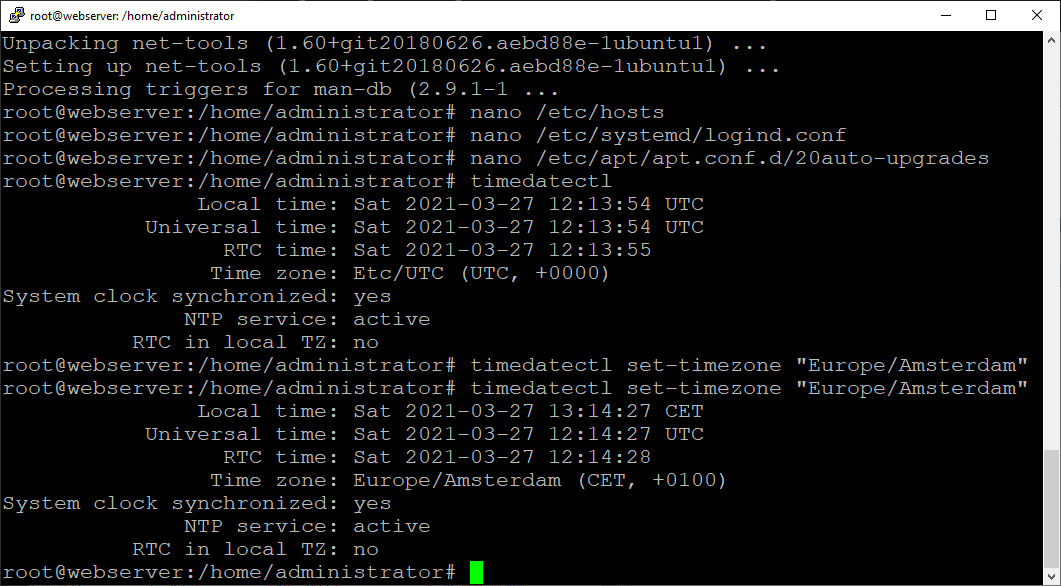
To set the time zone correctly, we issue the command:
timedatectl set-timezone "Europe/Amsterdam"
After this, we check whether the time zone is correct by again issuing the command:
timedatectl
Issuing the sudo command without the need to enter the password.
When we issue the sudo command we are always asked for the password. In order to manage the entire server via a web interface, a user is needed who does not have to enter a password for the sudo command. If, during the installation, we e.g. have created the login name "administrator", we will of course also use this account to manage the server. We will now ensure that the user "administrator" does not have to enter the password for the sudo command every time. To do that, we issue the command:
visudo
This command opens the sudoers file in the text editor.
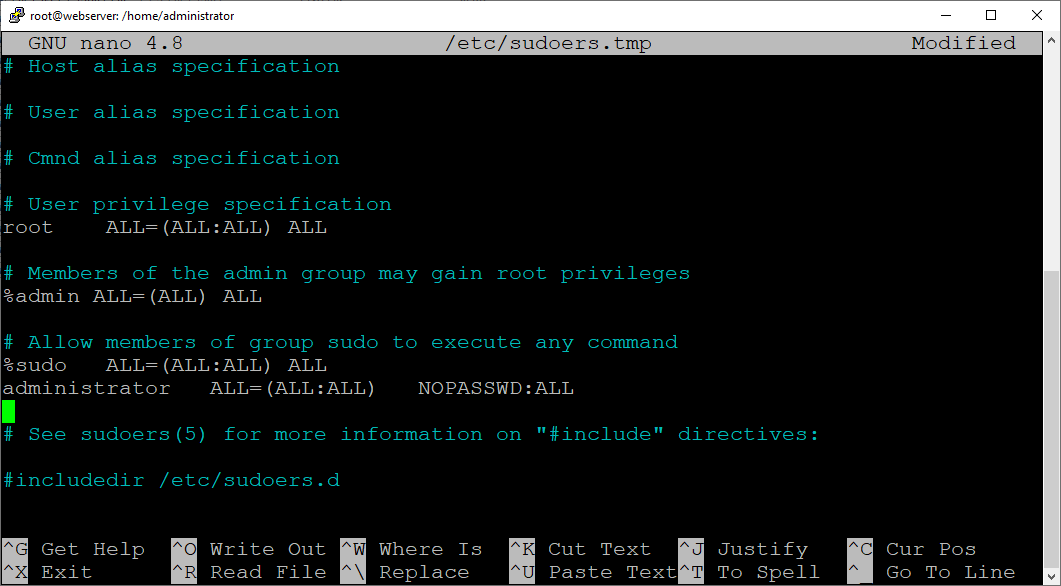
Just below the line '% sudo ALL = (ALL: ALL) ALL' we add the following line:
administrator ALL = (ALL: ALL) NOPASSWD: ALL
Then we save the file.
Restart the server.
We are now going to restart the server with the command:
shutdown -r now
If we want to shut down the server we use:
shutdown -h now
Install, configure and start the Dynu IP update client on the server.
You can find the instructions for installing the update client at https://www.dynu.com/DynamicDNS/IPUpdateClient/Linux. In our case we follow the instructions described on this page for Ubuntu 16. Actually this is the same for all current Ubuntu versions. Below you will also find these step-by-step instructions.
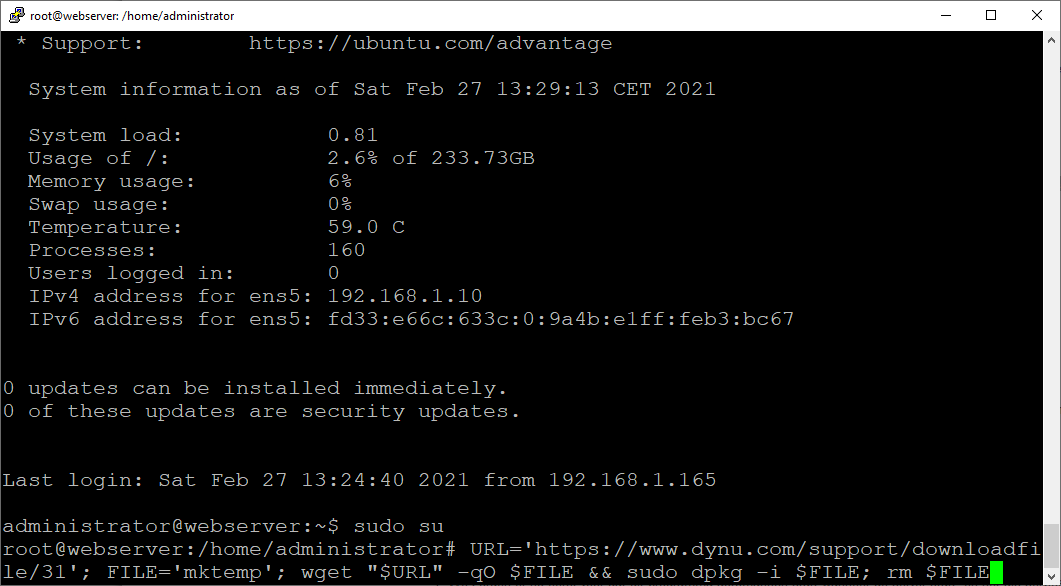
- Open PuTTY, login to your server and take root privileges with the command:
sudo su - To install the update client, enter the following command:
URL='https://www.dynu.com/support/downloadfile/31'; FILE='mktemp'; wget "$URL" -qO $FILE && sudo dpkg -i $FILE; rm $FILE
(this is all one line, so continue typing after the line ends. The command will wrap to the new line automatically)
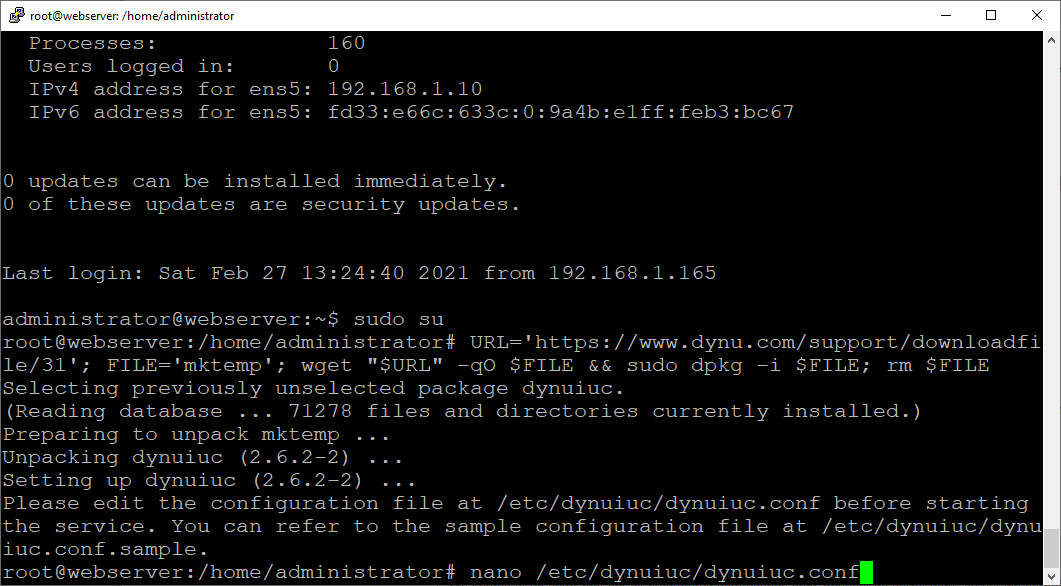
- After the software has been installed, we first have to edit the configuration file. Enter the command:
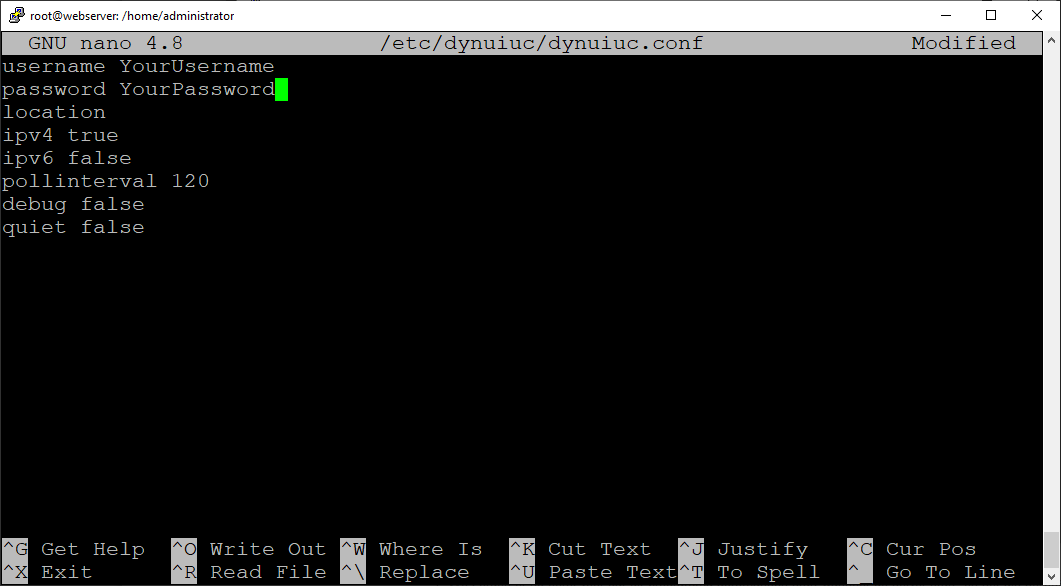
nano /etc/dynuiuc/dynuiuc.conf- Add your Dynu username behind "username".
- Add your Dynu password behind "password".
- Leave "ipv4" set to true.
- Leave "ipv6" set to true. (change this to false if your home connection does not have an IPv6 address.)
- Leave "poll interval" at 120. (This is the number of seconds between two update checks)
- Leave "debug" and "quiet" set to false.
- Save the file.
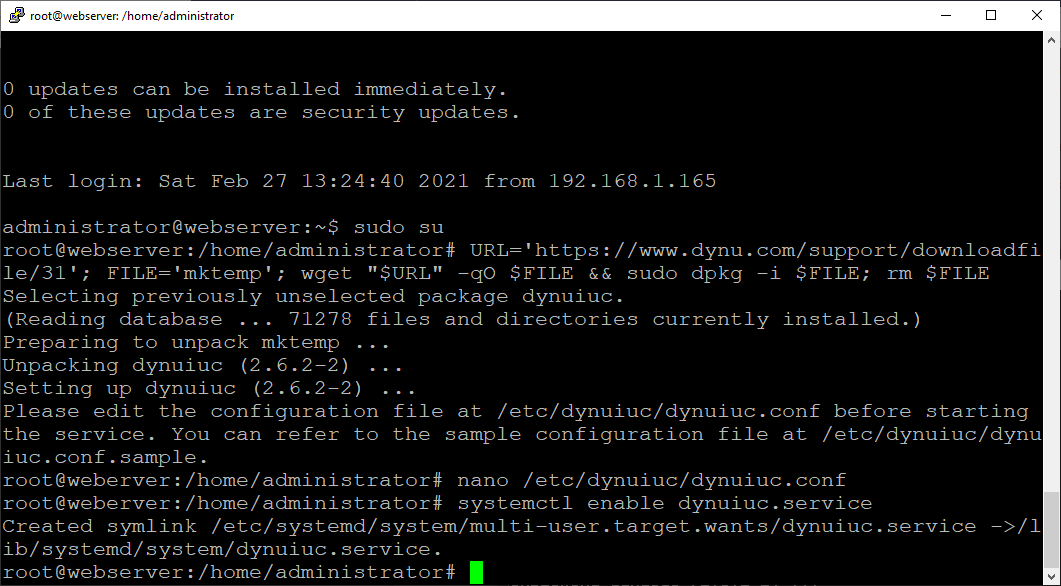
- We will now make sure that this program starts automatically when the server starts, and that it continues to run as a service in the background. To do this, give the command:
systemctl enable dynuiuc.service - We will now start the service with the command:
systemctl start dynuiuc.service
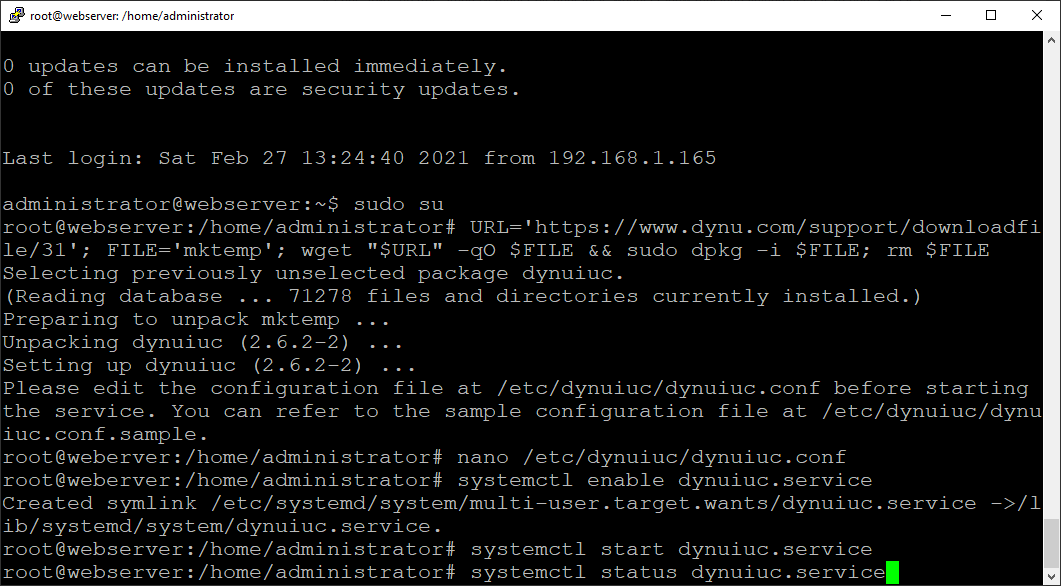
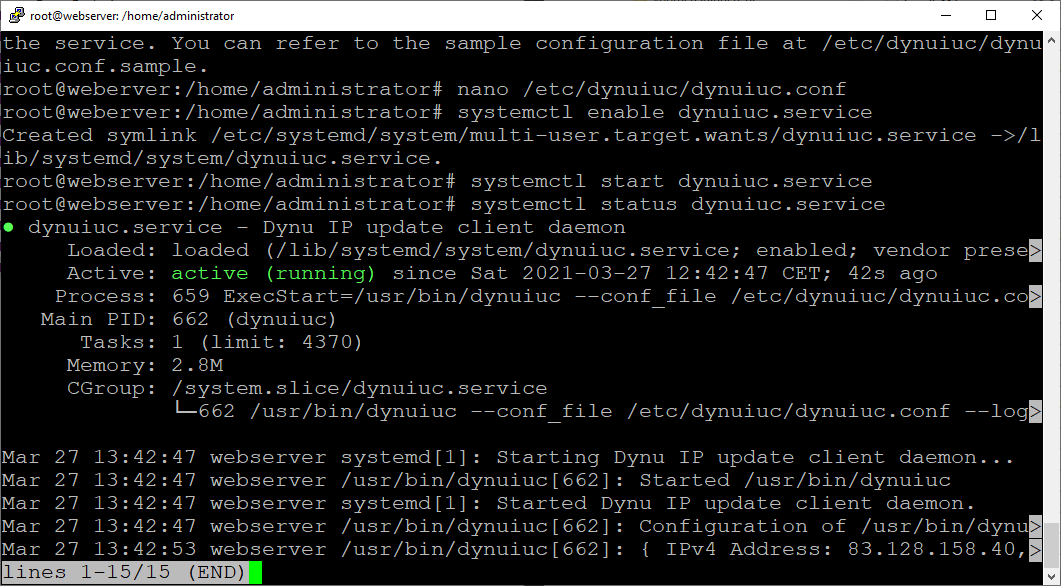
- We can check the status of the service with the command:
systemctl status dynuiuc.service - You can close the status screen with Ctrl-c.
- Finally we restart the server with the command:
shutdown -r now
When the server has been restarted, the update client will now also be started and will continue to run in the background.